Packs/Bags Page 1 Page 2 Page 3 Page 4 Page 5 Page 6 Page 7 Page 8
TO VIEW FULL SIZE IMAGES: USERNAME and PASSWORD are both "mm"
For packs from the following manufacturers, please go to my pages below:
Kifaru
Mystery Ranch
Maxpedition
EMDOM USA/MM TNT GYM (GreY Man) Bag
| 6/21/10 - The TNT (Tactical/Non-Tactical) GYM (GreY Man) Bag is my latest collaboration with EMDOM USA. It was designed as a truly covert means of transporting an AR-15/M4 carbine and equipment, or up to two carbines. The GYM Bag continues the concept behind the EMDOM/MM TNT Bag by having a product that looks 'non-tactical' from the outside and conceals its 'tactical' features inside. Design philosophy - When I came up with the design for a compact carbine case, which was first made as the MM4 case by Reccegear and evolved into the C3 (Compact Carbine Case) manufactured by SERT System, my goal was to design the smallest case in which a 16" carbine with upper and lowers separated would fit. One of the reasons was compactness/portability, and the other was discreetness. It'd be somewhat discreet because few people would think of a small, short case carrying a rifle. Since it came out, my thoughts turned to the idea of a truly covert case, or some way of transporting a carbine and gear in a discreet manner, that wouldn't draw immediate (or better yet, any) attention to the person carrying this case. There are quite a few well made discreet weapons cases/bags out there, but none really accomplished exactly what I had in mind - they were not commonly seen designs. The problem with gun cases, is that they look like gun cases even if they're made of 'non-tactical' colours and don't have the 'rifle shape'. A flat, rectangular case can cause someone to wonder 'what would fit in that? I wonder what's in it.' I had decided to concentrate on a breakdown design, with the upper and lower receivers separated. Like the Compact Carbine Case, the main reason is portability, and the secondary concern is noticeability. Again, if it's long enough to carry an assembled rifle, someone might think it does just that. I did not set out to design a rapid deployment bag where the rifle could be stored fully assembled and extracted for immediate use. I just wanted a covert transportation bag. There are many good discrete cases available if you don't want to separate the upper and lower and want quicker access to your weapon. If you're looking for that kind of case, the GYM bag is not for you. So, I came up with some constraints, or design objectives:
The reason I don't like rifles concealed in tennis racket bags or skateboard bags is that when carried by the wrong 'looking' person, people notice that something just doesn't add up. The 40-year old guy with a skate bag strapped to his back can look out of place just like the kid in baggy shorts would be carrying a leather briefcase instead of a canvas backpack. My idea of 'covert' was to be design something that wouldn't look unusual, draw any attention from the specialty groups, was a relatively common sight/design outwardly, and didn't look like it contained anything of specific value. Something that allowed you to remain the 'Grey Man' in the crowd. The first avenue I explored was a backpack. They're common, everyone has one, and they're easily carried. I came up with a design; EMDOM prototyped it, but we decided against proceeding with that particular design as it was too expensive to produce. One challenge with a backpack for a weapon is that a 16" upper is about 24-25" long. That's two feet. For a backpack to accommodate that, it'd have to be at least that tall. When I looked at backpack designs, the only ones that were two feet tall or more were backpacking packs, and most were relatively large, and not something you'd see people hiking around town with (depending on where you are) for every day use. I wanted something that would fit a carbine in a more commonly seen size and configuration. As I paid more attention to the types of bags I saw people use, or carry around in their cars, in public, at airports, at the beach etc, a particular design started to surface: the common sports bag, gym bag, mini duffel bag, travel bag, or in the 'tactical' world, the medium gear bag. In other words, just your basic utility 'bag'. These bags are usually of medium size, with either a shoulder strap or carry handles, and are a commonly used all over the world in some form or another. Just about everyone is familiar with that design. They're generic and non-specific enough that they don't really give any clues at to the contents of the bag. So, I set out to design a covert bag based on the common-looking gym bag, that was specifically constructed to transport a 16" carbine, plus some gear. EMDOM turned my sketches into an actual product, with their own manufacturing input, and the TNT GYM (GreY Man) Bag is the result. Note: I've had some people comment that it's expensive for a gym bag. That's because it's not a generic gym bag - it only looks like one from the outside. Retrofitting a cheap gym/duffel bag with a partition doesn't make it suitable for carrying two rifles. The TNT GYM bag is specifically designed to carry the weight of weapons and gear without printing or sagging like an empty balloon. GYM Bag overall specs and features (detailed descriptions are below):
|
|
Two models - The GYM Bag is available in two models/colour combinations. The first one is the Urban GYM Bag, which has a black body with SDU grey top panel and end pockets. The interior is foliage green. The colour combination looks smart, yet doesn't make it stand out any more than another sports/gym bag. If you google images of 'gym bag' or 'sports bag' and look at the variety of styles and colours, the Urban GYM Bag would be one of the more boring ones. The end pockets are a different colour from the main body to make the bag appear visually shorter. When people look at it, they see a bag with a pockets added on at each end. They don't realize that the entire length is used to store a rifle upper. More on that in a bit. The Urban GYM Bag is meant for around town, and transporting the rifle in urbanized areas. There are no plans to make the Urban GYM Bag in any other colours combinations at this time, as I felt this to be the most universal/practical. The Urban GYM bag has metal zipper pulls on all zippers. They can be cut off and replaced with 550 cord by the user if desired. The other model is the BFE GYM Bag, and it's made in Coyoteish. It's intended for users who aren't in major cosmopolitan areas, and for discreet transportation of the rifle in more natural/outdoor environments where the colour black may stand out more. Coyoteish is suitable for a wide range of environments, especially desert and arid regions, or way out in BFE (hence the name). The BFE GYM Bag assumes that the user may already have other gear - and this will just look like any other medium gear bag, or overnight bag. We tried a two-tone BFE Bag but it just looked too unusual, so we stuck with a solid colour. The BFE GYM bag has cord zippers pulls on the front and end pockets, to reduce the 'clinking' of metal pulls. The main compartment zipper is left as metal to allow it to be locked. Main Features - The GYM Bag is essentially a structured duffel, and has 1/2" closed cell foam on the bottom, sides and ends. The structure is necessary to support the weight of a weapon and gear, and to reduce 'printing' from the stuff that people mount to their weapons like scopes, sights, lights, grips etc. The carry straps are intentionally made long enough to carry the bag from the shoulder under/behind the arm, if the removable shoulder strap is not used. There is a single compression strap and SR buckle across the top. The bottom of the bag is lined entirely with loop velcro, to which the internal divider is attached. At each end inside is a vertical length of webbing sewn at the top and at the bottom - it was found during construction that adding this helped maintain the shape and structure of the bag by supporting the floor of the bag directly under the D-ring attach points. Also at each end is a patch of velcro for securing the ends of the internal divider. Now for the GYM Bag's 'secret'. The main bag body is only 22" long. Most carbine uppers are longer than that - 24" or 25" usually. The GYM Bag accomodates items longer than the length of the main body by having expandable partitions at each end made out of 1000D cordura. The partition between the main compartment and the end pockets is designed so that it can expand into the end pockets, adding another 4" to the main compartment. Why not just make a single compartment bag that's 26" long? To create the illusion of a shorter bag. With the end pockets looking like separate compartments from the main body, people assume that's the actual size of the main compartment. On the Urban GYM Bag, the different colour helps encourage this illusion. The partition expands both ways - outward and inwards (on the sides - the center is restrained by the vertical webbing on the other side), so the end pockets can hold bulkier stuff than they would otherwise.
|
|
Internal Divider - The internal divider holds the lower receiver. It is fully padded with a top zipper opening and sized to be a snug fit on any standard AR-15 lower receiver with grip that's close to standard dimensions. It will not fit lowers with the larger target-style grips that have the hand rest (like the HK PSG-1). It is 25" long and 8" tall, and can hold any length stock. If a lower receiver has an unusually bulky grip, it can always be stored outside the divider, separated from the upper. The divider has hook velcro at the bottom and ends which hold it in place inside the main compartment. It can be positioned against the vertical webbing at each end (which also adds support when a lower receiver is in the divider) to create a wider or narrower compartment, depending on the upper receiver.
|
Shoulder Strap - A 2" wide removable shoulder strap comes with the GYM Bag - black for the Urban model and Coyoteish for the BFE. It has a removable pad which is lined with rubberized material so it doesn't slip on the strap, and drilex for comfort on the shoulder on the bottom.
|
What fits in the GYM Bag? - The GYM Bag was sized to fit a carbine upper with 16" barrel comfortably, and experimenting with different uppers, I found that I was able to fit an 18" barreled upper in the GYM Bag. The bag is flexible, so it can be temporarily distorted to fit the longer barrel though the main zipper opening. It requires a bit of wrangling to get the longer uppers into and out of the compartment because the zippered opening isn't as long, so it's not designed as a quick-deploy bag, just a covert transportation bag. The GYM Bag is 8" wide, so it can accommodate uppers with accessories attached to them. I found that some discreet cases are designed for the weapon only, without much else attached to it. I wanted to be able to fit uppers with full sized scopes and optics on them, bipods, vertical grips, flashlights mounted on the side etc. The GYM Bag can actually hold two fully accessorized uppers, and one lower in the divider. Or one upper/lower plus gear. With a carbine in the bag, there's still ample room for mags, small chest rig, etc in the main compartment.
|
Complete rifles - I was also able to wrangle an AK folder into the GYM Bag. The maximum length that I can fit into it is 26.5", so if you have an SBR that falls under that length, it should be able to fit. Two rifles! - Since I had multiple dividers on hand, I tried installing two dividers (one on each side of the vertical webbing), and found that I could fit two lower receivers, and two upper receivers. It was a tight fit with 'bulky uppers' that had bipods and lights, and more comfortable with less bulky uppers, but possible, nonetheless. The lowers were arranged pointing in opposite directions, as were the uppers. So, in summary, I'm able to fit the following in the GYM bag:
Carrying the GYM Bag - As mentioned above, the GYM Bag can be carried with the carry straps, or using the removable shoulder strap. The carry straps are long enough for comfortable shoulder carry, and don't put the bag right up under your armpits. As you can see in the photos, the GYM Bag looks like a pretty non-descript medium-sized travel/sports/gym bag - inside are two uppers and two lowers. Although not specifically designed to be carried like a backpack, the GYM Bag can be carried on the back if desired. The thin webbing straps aren't as comfortable as a padded backpack strap, of course, but work fine for short distances.
|
Additional notes- The BFE GYM Bag looks like a generic medium gear/travel bag that most gear companies have variations of, so it shouldn't draw any more attention than bags of similar size and design. Positioning the divider - Now, I usually dislike dividers held in position by velcro in bags, because they keep getting stuck where I don't want them to while positioning them. The trick with the GYM Bag divider is to line the bottom of the bag with a plastic bag, piece of paper etc to prevent the bottom velcro from sticking. That way, the ends can be positioned first, then the plastic bag/paper removed and the divider stuck down securely. The divider ends can be placed on either side of the vertical webbing, which is in the center. The reason for putting the divider off-center is that most uppers don't need half the width of the bag; only about a third, leaving more space for gear on the other side. When carrying two uppers, I found that installing the divider at an angle worked best - with each end of the divider up against different sides of the vertical webbing. The uppers are placed in the compartments with their barrels pointing in opposite directions. Zipper pulls - As mentioned above, the BFE GYM bag has cord zipper pulls on the end pockets and front pocket, while the main zipper is metal to allow for locking.
|
Gear Bag - Most other discrete weapons cases are designed for that specific purpose, and if you're not carrying a rifle in them, you'd probably not use them for anything else. If you're leaving the carbine at home, the GYM Bag will do double-duty as a medium sized gear/travel/overnight/gym bag or mini-duffel, which gives the customer max usage and value for his money. The divider can be taken out or left in, and the GYM Bag will function as a structured/padded bag, rather than a floppy fabric-only duffel.
|
EMDOM USA/MM TNT GYM (GreY Man) Bag (Extended)
| 8/13/11 - The moment EMDOM USA and I release a collaboration on a bag, someone invariably asks if we're going to make it in other sizes. Well, in the case of the TNT (Tactical/Non-Tactical) GYM (GreY Man) Bag, we've made a slightly longer version, simply called the TNT GYM-E Bag (the 'E' means 'Extended'). The TNT GYM bag was designed as a truly covert means of transporting an AR-15/M4 carbine and equipment, or up to two carbines, and the TNT GYM-E follows suit, but is able to accommodate longer weapons. Design philosophy - The design philosophy of the GYM-E bag is the same as that of the original TNT GYM bag, so please read the writeup immediately above for its development background. The GYM bag was designed to carry 16" barreled AR uppers comfortably, but since it's a semi-soft case, it can deform and accommodate slightly longer weapons that its 'box' dimensions. We found 26.5" to be the limit that could fit inside the GYM bag. How much longer to make the GYM-E bag took some research. Too long, and it starts looking unusual, and we still wanted it to look relatively normal. We decided that adding 3" was the way to go, which makes the GYM-E bag 29" long, with the same width and height as the GYM bag. The 3" of added length means that it handle a greater variety of rifles. To address the issue of inserting a longer weapon in the bag more easily, we designed the GYM-E with zippered pocket partitions so that a rifle can be inserted from either end, instead of only through the main compartment zipper. It's a simple concept, but more difficult to implement that we thought. Anyway, it works reasonably well, and I've been using my TNT GYM-E bag prototype for over a year now. Again, I'll state that the TNT GYM-E bag is intended primarily for discreet transportation of firearms, not as a 'quick deploy' case. GYM-E Bag overall specs and features (detailed descriptions are below):
|
|
Two models - The GYM-E Bag is available in the same two models/colour combinations as the GYM bag - the Urban GYM Bag, which has a black body with SDU grey top panel and end pockets; and the BFE GYM Bag, which is Coyoteish. Main Features - Please read the writeup on the GYM bag for the GYM-E bag's main features. Difference between the GYM-E and GYM bags - The original GYM Bag's 'secret' is that it accomodates items longer than the length of the main body by having expandable partitions at each end. The partition between the main compartment and the end pockets is designed so that it can expand into the end pockets, adding another 4" to the main compartment. Why not just make a single compartment bag that's 26" long? To create the illusion of a shorter bag. With the end pockets looking like separate compartments from the main body, people assume that's the actual size of the main compartment. On the Urban GYM Bag, the different colour helps encourage this illusion. The partition expands both ways - outward and inwards (on the sides - the center is restrained by the vertical webbing on the other side), so the end pockets can hold bulkier stuff than they would otherwise. For the GYM-E bag, the main compartment was increased by 1", and so was each end pocket, for a total of 3 added inches. When stuffing a longer weapon into the GYM bag, the difficulty in getting it in or out was due to the length of the main compartment opening. On the longer GYM-E bag, the partitions can now be zipped open, which allows the rifle to be inserted from either end, as well as through the main compartment top zipper. This was done because the actual weapon length the bag can accommodate is 6" longer than the length of the zipper. Getting a rifle to fit through that would have been a challenge. As you can see in the photos below, the side pockets are zippered and can open out flat. The black partition also has a zipper, which allows it to be partially opened, or fully opened. The internal divider can either velcro to the partition or the inside of the side pocket. The vertical strap you see in the center provides structural support for the bag when carried by the D-rings. It prevents the bag from sagging at the ends. The partition can be rolled to the side and velcro'd in place, out of the way, if desired.
|
|
Internal Divider - The internal divider of the GYM-E is 28" long, instead of the 25" of the GYM bag. It is fully padded with a top zipper opening and sized to be a snug fit on any standard AR-15 lower receiver with grip that's close to standard dimensions. It will not fit lowers with the larger target-style grips that have the hand rest (like the HK PSG-1). If a lower receiver has an unusually bulky grip, it can always be stored outside the divider, separated from the upper. The divider has hook velcro at the bottom and ends which hold it in place inside the main compartment. It can be positioned against the vertical webbing at each end (which also adds support when a lower receiver is in the divider) to create a wider or narrower compartment, depending on the upper receiver. Shoulder Strap - A 2" wide removable shoulder strap comes with the GYM-E Bag - black for the Urban model and Coyoteish for the BFE. It has a removable pad which is lined with rubberized material so it doesn't slip on the strap, and drilex for comfort on the shoulder on the bottom. Weapons that fit - Illustrated below are some rifles that will fit in the GYM-E bag; a SCAR 16S, Para FAL, HK93, and an AK side folder. I found that the easiest way to insert the rifles into the bag are to open one end, insert the rifle through the top main compartment with the barrel sticking out the open end to assist in getting the rear end of the rifle into the main compartment then zipping the end shut. It's a tight fit for the SCAR and Para FAL with optics on top, but they do fit. Here are the measured lengths of the rifles below: SCAR - 28", Para FAL - 29.5", HK93 - 30", AK - 26.5". So, while the seam-seam dimension of the GYM-E bag is 29" in length, the bag can deform enough to hold a weapon 30" in OAL. That's the limit for it. So, if your rifle with folded stock or complete SBR is 30" or less, it'll fit in the GYM-E bag. Please visit EMDOM's website for more photos and information.
|
| Source Hydration Diamond 3L Low Profile Armour Hydration System 12/2/10 - The Diamond 3L Low Profile Armour Hydration System from Source Vagabond Systems is the latest offering from their military division. It was originally designed for compatibility with the U.S. Marine Corps IOTV, IMTV; but can be used as a stand-alone hydration pack, and is also adaptable to a wide variety of armour and vest systems through a very simple integral attachment system. The diamond-shaped reservoir is baffled so that it has a 33% slimmer profile than conventional hydration systems. Diamond 3L Reservoir - The first part of the Diamond system is the diamond-shaped 3L (100 fl oz) reservoir. The reservoir has a single baffle running down the centerline, which keeps the center of the reservoir from expanding outward. This keeps the profile of the reservoir flatter. To keep the volume at 3L, the Diamond reservoir is wider than a standard 3L Source reservoir, as shown in the photo below. The Diamond reservoir has a patented leakproof Widepac slider opening at the top, just like the other Source reservoirs. It doesn't have an additional filler cap like the others, though, so save weight and bulk. It utilizes the same Source Quick Connect (SQC) adapter that allows tubes to be connected and disconnected without leaks or drips. The drinking tube is weave-covered to add UV protection and insulation, and the Source Quick Mate Technology (QMT) offers 'one-click' installation of drinking valves, UTA tube refill adaptors, and other Source accessories. The other features of Diamond reservoir is the same as the other Source Military Reservoirs:
UTA
- The Universal Tap Adapter (UTA) is a new accessory that enables
any Source reservoir with QMT to be refilled without taking it off
your back. The UTA is an adapter that fit standard disposable water
bottles, many faucets, military 5-gallon water cans and other bottles.
The UTA is used by disconnecting the drinking valve from the drinking
tube via the QMT, and replacing it with the UTA, which clicks right
in. The UTA is made out of durable silicone and forms a tight seal
around the neck of a water bottle. The bottle is simply lifted above
the reservoir allowing the water to flow into the reservoir. The UTA
is disconnected, and the drinking valve is reconnected. |
|
Diamond Hydration Carrier - The Hydration carrier for the Diamond system is quite a unique item. It's a stand-alone hydration pack with light weight stowable shoulder straps, and also serves as a hydration carrier that attaches to armour and other load bearing vests. It was originally designed to be compatible with the USMC IMTV, IOTV but has a simple but versatile strap attachment system that enables it to attach to other vests. There's a velcro strap on top that's supposed to connect to the MTV but isn't used for other vests. Some of the main features of the carrier are:
|
|
The armour-attachment method of the carrier is quite
unique. There are four 3/4" wide straps at each corner of the
carrier, with a side-release buckle (the female buckle is sewn to
the carrier). The straps can be routed through PALS webbing, around
shoulder straps, or just about anywhere they'll fit. It's a deceptively
simple yet effective mounting method. I've illustrated it below mounted
to the back of a DBT Predator armour carrier, and also my old BH STRIKE
chest harness. The top strap of the carrier simply wraps around the
shoulder of most vests; in through the arm hole on the side and then
through the neck opening. The bottom strap just attaches to PALS webbing
at the back. It's very secure and keeps the carrier in place. |
|
On the STRIKE vest shown below, I just routed the top straps through loops on the STRIKE shoulder straps, and connected the bottom end of the shoulder strap directly to the vest, using it as a waist strap. You can see how low profile and streamlined the carrier is on my back; it's more of a rounded 'hump' than a rectangular box shape. It's also very stable and comfortable in this particular configuration. So far, this is one of the most versatile hydration systems for armour that I've seen.
|
| Source Hydration Rider, Dagger and Razor Hydration Carriers 2/5/12 - The Rider, Dagger and Razor Hydration packs from Source's military division are designed specifically for ballistic vest integration. The Rider and Dagger use the simple but very effective X-QCA buckle system while the Razor uses molle straps. All of them are equipped with the new WLPS 3L hydration reservoir, which is baffled so that it has a 33% slimmer profile than conventional hydration systems. This creates a slimmer design which increases comfort for riding in a vehicle or wear under rucks. WLPS 3L Reservoir - Please follow this link to the WLPS 3L Reservoir writeup. Rider 3L Hydration Carrier - The Rider carrier functions as a stand-alone hydration pack with light weight stowable shoulder straps, and also serves as a hydration carrier that attaches to armour and other load bearing vests. It utilizes the X-QCA (I don't know what that stands for) buckle system, which is similar to the QCA system used on the Diamond carrier (above), but with the upper and lower straps configured in an 'X' instead. It's even more stable than the QCA, is very simple to use and enables the user to position the pack optimally. Some of the main features of the Rider carrier are:
|
|
The Rider's front panel has a dual-zippered configuration - it can be opened by pulling on the tab at the end of the panel. Inside the main compartment are:
Shown below, the Rider is attached to a DBT Predator vest using the X-QCA straps. They are routed through the molle webbing on the vest, then tightened equally. They can be routed around shoulder straps etc if molle webbing is not available.
|
|
Dagger 3L Hydration Carrier - The Dagger Hydration carrier is for the most part identical to the Rider Carrier, except that it only functions as a hydration carrier that attaches to armour and other load bearing vests, since it lacks the shoulder straps of the Rider. The Dagger also utilizes the X-QCA buckle system for attachment to ballistic vests or rucks. Rather than re-list the same features, please refer to the list of features for the Rider above. Here is a list of differences between the Rider and Dagger:
|
|
Razor 3L Hydration Carrier - The Razor 3L is a low profile hydration pouch, designed specifically for integration with molle/PALS-based ballistic vest or load bearing equipment. Since it has no shoulder straps, it cannot be used as a stand-alone system. Some of the main features of the Razor 3L carrier are:
The Razor 3L has six rows and
six columns of PALS webbing on the front for attaching molle-compatible
pouches. On the back are two long molle straps for attaching it to
molle rigs. The straps have two loops of webbing added to the top,
and short lengths of webbing covering the snaps at the bottom (when
the snaps are not snapped). They're there to aid in removing the carrier
from a molle vest. The short lengths cover the snaps and prevent them
from getting hung up on the vest's webbing. The two loops at the top
are to aid in pulling the molle straps out. They make removing the
carrier much quicker and easier. The Razor can be mounted higher or
lower by threading the molle straps through the top row of webbing
on the back of the Razor (for a higher mount) or not (for a lower
mounting position). Honestly, I prefer the attachment system of the
Rider and Dagger to the molle system of the Razor, as they can be
used on a greater variety of platforms. |
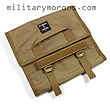
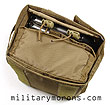
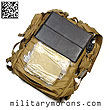
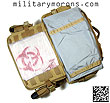
| 9/16/09 - CTOMS (Canadian Tactical & Operational Medical Solutions, Inc) is a company dedicated to providing training and equipment for the medic and soldier, LE officer and paramedic, SAR technician, first responder and health care professionals that go into harms way, and those that provide medical care in remote and dangerous places. The CTOMS 2ndLine Pack System is a modular pack system that is a bit of a departure from most other packs that most people are used to. Instead of being a single, large pack, the 2ndLine Pack System consists of two equally sized packs; a main pack and an external module that can be used separately or together, depending on the needs of the user. 'Versatility', 'customization', and 'modularity' were the key focal points in the design of this pack. Overall design and features - Through experience on the battlefield, CTOMS realized that tactical environments and operations are fluid and every changing. A person and his equipment need to be flexible to accommodate changes in mission, situation and environment. With that in mind, CTOMS set out to design a pack system that would be easily customized and configured to meet a wide variety of needs. The 2ndLine Pack System was originally designed as a medic pack system; the CTOMS MED 2ndLine. Note that prices on the CTOMS website are in Canadian dollars. In this case, CTOMS stands for "Combat Trauma Organization Management System", as tactical medicine is CTOMS's main focus. It consists of the main pack and external module; both with the same carrying capacity. Either one can be used as a stand-alone pack or the external module can be attached to the main pack to double the capacity. A variety of accessories are available for internal and external organization; some of which are designed for medical equipment, but can also serve many other non-med pack roles, as you'll see below. I'm using it to organize and carry shooting gear. Why '2ndLine' instead of '3rd Line'? CTOMS chose that terminology because the pack was designed as a speacialists pack, who needs the pack contents to do their job as their 2nd line gear, not their 3rd line. Of course, the 2ndLine pack system is not relegated to 2nd line use only. While the 2ndLine pack was originally designed for medic use and only came as a complete package, CTOMS discovered that it would serve other non-medical roles as well, and are also offering different combinations of components, as well as adding new items. Here's the breakdown of what the available combinations are called:
Note that the MED internal organization components consist of 4 x MARS panels, 3 X Book folders and 3 x Quad fold pouches. Also included are 6 blank Glow Labels, curved forceps and instructions. Also note that newer versions of the packs will be made of 500D Cordura instead of 1000D for weight savings. The Crye MultiCam shown here is a special order colour with minimum quantities required. Main Pack Features The main pack is a low profile, panel-loading pack, measuring approximately 20" tall x 14" wide x 4" deep (seam to seam measurements). The pack will stuff out considerably and accommodate bulkier items. The front panel opens completely to the left, allowing complete access to the contents of the pack. External features
Internal features
|
|
Main pack worn - As you can see in the photos below, the Main pack has a very low profile when seen from the side, allowing the wearer to operate more effectively in confined spaces such as vehicles, aircraft and buildings. Rather than extending out to the back, it's wide and flat. It's meant to ride high, which is why a waist strap is not included with it. It's shown below with the optional Saddle Bags (side pockets). They attach with malice clips and come in left and right versions. When the pack is worn low, the pockets can be accessed with it on. I had difficulty unzipping them when the pack is worn high, though. I found myslf accessing them more when the pack was not being worn, so I turned them around later so the zippers open to the rear (not shown here). External Module Features The external module is exactly the same size and capacity as the main pack, and can be used as an E&E pack or a lightweight stand-alone pack. It's essentially a 'simpler' version of the Main pack. External features
Internal features
|
External Module Worn - The External Module wears similar to the Main Pack, except that the shoulder straps are unpadded and non-removable, and don't have a sternum strap. Main Pack with External Module Attached Should the Main Pack capacity be too small, the External Module can be quickly attached with the two zippers (top and bottom) and the existing compression straps on the Main Pack are then connected to the external module. This doubles the packs capacity.
|
The External Module is solidly attached, using this method. Both the Main Pack and External Module can be opened independantly, just by unclicking the compression straps on the right side and the top. The ones on the left side can remain buckled. As you can see in the photo below, even when the External Module is attached, the pack still remains relatively low profile, especially because of the lack of external pockets (except for the Saddle Bags). Internal Organization Components The CTOMS MED packs come with some of the internal organization components shown below. Others are available separately as accessories. Half MOLLE Panel - The Half Molle Panel covers half a panel, hence the name. There are 4 rows x 8 columns for attachment of any MOLLE compatible pouch. A full molle panel is also available (not shown here). Clear pocket - The Clear Pocket has 9.5" x 5" of flat storage space, for smaller items or maps etc. It's velcro-close with pull tabs for opening. There's a loop velcro strip on the top for a label. Mesh pocket - The Mesh Pocket measures 11" x 5.5" and is intended to be placed at the top of the front panel so that it's accessible through the top of the pack, by only unzipping it at the top. It has one row of MOLLE webbing sewn inside for dummy cording items inside. Modular Adjustable Retention System - MARS Panel - The MARS panel is a pretty nifty way of providing the user with a customizable elastic loop panel. It's a 9" x 6" sheet of stiff plastic sheet, with mesh material sewn onto its front and velcro on the back. The mesh has hexagonal holes in it, in a honeycomb pattern, through which elastic shock cord can be weaved in and out to form loops. The size of the loops are determined by the user and are limited only by the geometry and distance between the holes in the mesh, and the length of the shock cord, of course. Shock cord and cord locks are supplied with each MARS panel (3 long and 2 shorter pieces of shock cord and 5 cord locks). A forceps is supplied with the MED packs to facilitate the weaving of the shock cord. Each CTOMS MED pack comes with four MARS panels. The MARS panels will attach directly to the velcro in the pack, or to the Book Folders. Use of the MARS Panels requires some planning. It's useful to lay out the items you want to attach to the panel, in the arrangement they're going to be on the panel, before you start weaving shock cord. The mesh is sewn down tight to the panel, so the shock cord requires the forceps for lifting up the mesh so the end can be threaded under it then out. When items are removed, the shock cord is pretty well retained by the mesh and doesn't loosen up much or cause the other items to fall out of their loops.
|
Quad Fold Pouch - The Quad Fold Pouch is made out of 420D cordura, and has a base measurement of about 9" x 6". The height of the pouch is limited to the length of the flaps, and will accomodate items about 4" in height, if they fill the pouch. The side/inner flaps overlap and are secured with velcro, with a pull handle on one of them. The outer flaps fold over lengthwise, and also secure with velcro. There are pull handles on both flaps for quick opening of the pouch by pulling them apart. This was specifically chosen over a zipper closure so that the act of opening the pouch was a gross motor movement vs. a fine one. One of the handles has velcro on it for glow labels. The entire Quad Fold pouch can be ripped out from the main pack by grabbing both handles together and pulling. The inside bottom of the pouch is lined with velcro. The CTOMS MED pack comes with three Quad Fold pouches. The Quad Fold Pouch is pretty roomy, and a great way of organizing rifle and pistol ammunition in the pack. As seen below, it can accommodate different combinations and sizes of ammo boxes. I'm able to fit six factory boxes of Black Hills .308 match, or three 50-round plastic boxes of .308, or six 50-round plastic boxes of pistol ammo with room to spare.
|
Book Folder - The Book Folder is a tri-fold pouch, similar to the Quad Fold pouch but with the ends left open. The base of the Book folder is a bit larger than the Quad Fold, measuring about 10" x 6". It's also made of 420D cordura and attaches to the inside of the main pack. The Book folder has two panels with large slot pockets, covered in velcro. Two MARS panels can be installed to the velcro, or a Quad Folder can be attached to the each panel. The panels overlap and secure with velcro at the top, and two handles enable the Book Folder to be ripped away from the pack when grabbed together, and quickly opened when pulled apart. There are also two 3/4" compression straps with ladder locks for cinching down the contents. In the pics below, I've illustrated a Book Folder set up for pistol matches, with a Quad Folder full of pistol ammo boxes and a MARS panel with ten .45 1911 magazines. It can be easily grabbed out of the Main Pack and used as a stand-alone unit.
|
|
Shown below are the Mesh and Clear pockets mounted inside the front panel, with the half MOLLE panel below them. Three Book folders and one Quad folder are mounted inside the main pack compartment. General Impression and Notes - My interest in the CTOMS 2ndline Pack System is from a general use/shooting pack, rather than a combat medical pack. I can see this pack being used by competition shooters - for both pistol and rifle who will appreciate the ease in which items are organized and accessed. I used the 2ndline pack system for a trip out to the desert (click here for more pics of the trip) where we were shooting long guns. I used both the Main Pack and External Module.
Before shooting, I did a bit of walking/scrambling around the area to see how the pack carried. Since this pack was designed for combat use as an assault or med pack where the user is wearing it over body armour or load bearing equipment, it doesn't have a suspension system or waist belt - all the weight is on the borne on the shoulders. The frame sheet does provide some stiffness and shape, but is still flexible enough to comform to the body. That being said, I still found it quite comfortable to haul my gear around and stable enough when climbing up and down rocks that I didn't feel the need for a waist belt. I had my shooting kit organized inside the Main Pack in three Quad Fold pouches and a Book Folder, as shown below. I had both .308 and .223 ammunition, a wide-angle SLR camera lens, my EMDOM Kitmat, AR multitasker tool, an Ergo rear squeeze bag, laser rangefinder, Sordin hearing protectors, notebook and pens, two FRS radios, gloves, hat, and some other misc items. I had my Tactical Concealment Viper Hood in the external module along with some clothing/soft items (BDU top, boonie hat, cap, shemagh).
The Quad Fold pouches and Book Folders worked very well for organizing and segregating the loose items in the pack, and prevent shifting of the contents, especially the heavy ammo boxes. The slim profiles of the packs are deceiving - both of them can 'stuff out' and accommodate items bulkier than their seam-seam box dimensions. Any velcro-compatible pouches or organizers can be used in the main pack or external modules - they're not limited to the CTOMS internal organizers. Besides the original med pack role that these packs were designed for, I can definitely envision them being used for a variety of other roles where light weight, modularity and organization are needed. Competition shooters (especially long range rifle shooters), for example, will appreciate the quick access and internal organization that these packs are capable of, and the comfort over a regular range bag that they provide, especially if there's some humping involved over distances and you have to carry all your equipment with you. Used alone or with the External Module, the Main Pack would serve well as a light assault pack/2-day pack, expandable as the mission dictates. In the medical pack role, or any other where organization and modularity are desired, the CTOMS 2ndline Pack System is well worth considering. |
Saddle bags and exterior pouches On the outside for fast access are hemorrhage control items - tourniquets, bandage and hemostatic dressing. There is also a triangular bandage so that I can stabilize a pelvis quickly, primarily prior to extrication, without having to dig into my pack. I also have signaling equipment handy on the outside of the pack - glow sticks, strobe, panel marker, smoke etc. These are in the Saddle Bags and Tourniquet Pouches on the outside. Photo 7 - Saddle
Bag: Strobe, Smoke, Panel Marker, Headlamp and glow sticks. Photo 8 - Saddle
Bag: Triangular bandage, Combat Gauze, 4" Olaes Bandage. Interior layout I made the pack open sideways like a book so that when the pack was open, it had the smallest foot print possible. I don’t like medic packs where the flap opens to the bottom. The foot print is huge and doesn’t facilitate operating in a confined space. I also put a frame sheet in the flap so that I can lean it up against the wall and it doesn’t collapse. On the inside, it's a very straight forward layout. The labels I made with a glow in the dark background and with a label sheet, you can put it in a laser printer and create custom labels. The glow backlights it so that you can read them in low light. This way you can do labels in any language and terminology you want. The labels are also removable with Velcro so you can orient them and the pouch the way you want. The label is the actual handle that pulls the pouch out of the pack as well. The pack can also be hung without its contents spilling. Photos 9 and 10 - In the main pack, I set it up so that the most important module - hemorrhage control, is closest to my right hand (right hand dominant). The second most important is closest to my left hand - Airway and Breathing. The ones that are less important are in the 'back row'. The way I arrange the Book Folders, Quad Fold Pouches and MARS Panels is so that they can all be opened while they are in the pack, and you can visualize everything. As much as possible, I also try to secure everything down. If everything but the Quad Fold Pouches are opened, you can pick up the pack at the top or side handles and shake it, and nothing should fall out. When you open the Book Folders, the MARS Panels unfold to the outside, so that nothing is overlapping. I try to keep 'one layer' of kit. There are actually several layers, but they are organized layers. What I avoid, and another aspect I dislike about most medic packs is that they tend to be packed as a stuff sack, with layers of kit that require digging through to find the right piece of equipment. This inevitably turns into the med bag kit bomb far too quickly, and far too frequently. I think this is a failure of design, not necessarily the medic's equipment management skills (though I'm sure it is a combination of both). The other thing I tried to do was to keep weight down. My third dislike about med bags is the amount of nylon, buckles and zippers that go into them to make an 'organization system' but they turn into a heavy maze of nylon where is it actually slow to find things because they all have their 'little corner pocket' and the weight of the construction adds up quickly. On the inside inner flap is the miscellaneous items. Gloves in the window pocket for quick access. Also Warrior Wipes to wash my hands. I threw my otoscope in there because I basically had nowhere else to put it. The Mesh Pocket on the top can be accessed without opening the entire pack. I keep the main opening zipper tabs on the top right corner. This allows me to easily open the top of the pack without opening the side. It also facilitates a simple and quick opening of the entire pack. I always know where the zipper tabs are. In the Mesh Pocket I keep casualty and triage cards, a marker, hemostats and safety pins. Photo 11 - Mesh Pocket: Small Wound Kit, CasPro Kit, 2 x hemostats, Safety Pins, Casualty Cards (not shown). Window Pocket: Gloves, Warrior Wipes, Otoscope.
|
Book Folders and Quad Fold Pouches The Book Folders and Quad Fold Pouches all opened using gross motor movements. You grasp the handles with your two hands and pull apart, as opposed to trying to grasp a tiny zipper pull when your buddy is laying in front of you missing his leg and clinging to life and your hands are shaking like crazy with blood all over them. Photos 12 and 13 - Hemorrhage Control Pouch - 2 x 4" Olaes Bandages, 2 x Blast Bandages, Combat Gauze, Combat Gauze Trauma Pad, HemCom Bandages, Emergency Military Tourniquet. Normally, med bags have sewn loops of elastic
webbing to secure items. The elastic wears out and you have to make
your medical kit fit into the elastic loops. Instead, I wanted the elastic
loops to fit my medical equipment, so I Photos 14 and 15 - Airway and Breathing Pouch - Suction Easy and pediatric catheter, Heimlich valve, Surgical Airway Set, 2 x 10g x 3" angiocatheters, 1 x 14g x 3.25" angiocatheter, 3 x nasopharyngeal airways with lube, NuMask (on BVM) with 2 x oropharyngeal airways, NuMask holder and nose clips, SMART Bag Valve Mask with PEEP valve, CBRN Adapter and CBRN Filter (not carried in pack. Shown only for capability). 1 x hemostats, 2 x HALO Seals (not shown).
|
I also like to 'pre-pack' specific procedure kits. For example, I take the antibiotics, sterile water, syringe, needle, swab and put them in a small zip lock bag, and them secure it down. I also designed a saline lock kit and surgical airway kit for the same reason. I don’t like searching for each different component in my pack to do a procedure when I can simply grab one little bag and know that I have everything in there for that particular procedure. Photos 16 and 17 - Fluid Administration - 1 x Mobile IV Systems inflatable cuff, 2 x MIVS all position administration sets, Manual EZ-IO, Sternal EZ-IO, 2 x Saline Lock Kits, 3 x spare IV angiocatheters, 50cc Normal Saline (to flush saline locks), 2 x Hypertonic Saline Dextran (Canadian Forces use only - US would use Hextend), 3 x GastroLyte. Photos 18 and 19 - Medication Pouch - Various syringes and needles, antibiotic kit, Sharp Shuttle, 2 x Drug Boxes and drug vials, 2 x small pelican cases for tablet medications.
|
At the end of the day, as a medic you should
be able to walk into any bad combat casualty situation with a plastic
shopping bag full of an obstetrics kit, a rubber chicken and curling
iron and have the skills and confidence to Thanks to Chris for sharing this information.
|
TO VIEW FULL SIZE IMAGES: USERNAME and PASSWORD are both "mm"
ATTENTION! PLEASE DO NOT LINK DIRECTLY TO MY IMAGES
-
IT RESULTS IN MY BANDWIDTH ALLOCATIONS BEING EXCEEDED,
AND MY PAGES GO DOWN. THANKS!
/ . PLEASE
OBSERVE AND RESPECT OUR COPYRIGHT! . /
©opyright by MilitaryMorons.com. All Rights Reserved. Reproduction, Duplication,
Distribution Strictly Prohibited.
Unless mentioned otherwise, content and images are the
property of militarymorons.com and are not in the public domain.
They are not to be used without
permission. Please Contact
me for permission to use any images or content herein.
