Head Gear Page 1 Page 2 Page 3
TO VIEW FULL SIZE IMAGES: USERNAME and PASSWORD are both "mm"
10/28/13 - The Hoplite from Phokus Research Group is a Night Vision Focusing Cover that installs on night vision goggles. It utilizes interchangeable apertures which allow the user to leave the NVG focused at infinity then flip the cover closed for close-up work. It also provides dust and scratch protection for the lens. Background - One of the issues that users of Night Vision Goggles (NVGs) or Night Vision Devices (NVDs) will be familiar with is transitioning back and forth between near-far focusing. NVGs like the PVS-14 and PVS-7 shown here can be focused from about 6" to infinity by rotating the objective lens at the front, but frequent refocusing is needed if you need to see both near and far as the depth of field is quite shallow. When going from outdoors into a building or structure, if the NVG is focused at infinity, anything under about 25-30 feet becomes out of focus. The closer the object, the more out of focus it will be unless the NVG is refocused. Everything inside a room is quite blurry if the NVG is focused at infinity. The Hoplite from Phokus Research Group is a device that installs onto the NVG that deepens the depth of field, allowing more to be in focus at different distances. This decreases the need to refocus as often, and enables the user to leave the NVG focused at infinity for most far and medium distance tasks. It replaces the dust cover and sacrificial lens. Phokus Research Group was founded by a former military end-user and the company's primary mission is to partner with Soldier inventors for the purpose of protecting, developing and commercializing their ideas. Description - The Hoplite works on the same principle that's used on any camera lens to deepen the depth of field: by manipulating the aperture to adjust the depth of field. With photography, a higher f-stop (smaller aperture) deepens the depth of field, which means that there's a wider range of distances from the point of optimum focus that objects will appear to be in focus. With a smaller f-stop (larger aperture), the depth of field is shallower, so that fewer object will be in focus as the distances vary from the point of optimum focus. The Hoplite kit consists of the Hoplite body/cover assembly, two accessory apertures and a rubber adapter for the PVS-15 and 18. The body has a hinged dust cover top, which flips open and closed on a hinge. There is no detent; it relies on friction to keep it closed and open. The body has an integral lanyard loop for securing it to the NV device to prevent loss. The Hoplite body incorporates a rotating tension lock which decreases the inside diameter of the body so that it locks onto front of the NVG. Rotating the tension lock clockwise (when looking from the front) 'contracts' the inside of the body, which tightens its grip on the NVG objective lens. You can see the travel-limiting pin inside the body that moves in a slot in the photos below. The inside of the body has slits/cutouts. When the tension lock is tightened, the gaps close ever so slightly reducing the inner diameter of the body to secure it to the objective lens. The PVS-15 and 18 have smaller diameter objective lenses so the included rubber adapter is used with them. The Hoplite is made of polycarbonate and 18-8 stainless steel (for the retaining ring and small parts). It weighs 0.88 oz.
The Hoplite has a clear sacrificial lens built into the body which is replaceable. Typically, the PVS-14 and 7 are supplied with a rubber dust cover and clear sacrificial lens; but they can't be installed at the same time. I usually just leave the clear sacrificial lens on the unit. With the Hoplite, you get both. The Hoplite dust cover lid has a hole in the middle that's larger than the pin hole found on the issue/standard dust cover, and also serves to protect the sacrificial lens from scratches and bumps. The aperture in the Hoplite dust cover top is 5/16" in diameter. The user can choose to use the Hoplite with the dust cover aperture only, or install either of the two additional accessory apertures inside it. The accessory apertures have 3/16" and 1/8" diameter holes, and snap into the inside of the dust cover top. In this writeup, I'm referring to the dust aperture (5/16") as 'large', the 3/16" as 'medium' and 1/8" as 'small'.
Installed on PVS-14 - The Hoplite installs in seconds to the objective lens of the PVS-14. The recommended orientation is to have the dust cover top open away from the battery knob/variable gain knob where it doesn't interfere with the controls or obscure the IR illuminator when open or closed. As mentioned before, there's no detent keeping the cover open or closed; it relies on the friction in the hinge. It has just the right resistance; stiff enough to keep it open or closed securely without making it difficult to do either, or mess up the focus when opening it.
Installed on PVS-7B - The Hoplite installs on the PVS-7 in exactly the same way as the PVS-14 as they share the same objective lens size and take the same lens-mounted accessories.
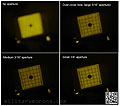
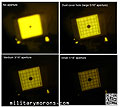
Notes/observations - A very important factor to consider is that the apertures reduce the amount of light entering the lens since they're so much smaller than the objective lens diameter. Depending on ambient lighting conditions, the use of the built-in IR illuminator on the goggles is recommended for indoor use in very dark rooms. I took the photos below through the PVS-14 to illustrate how the different apertures affect focus, and relative brightness. For the first picture on the left, the reflective target is at 6 feet and the PVS-14 was focused at infinity. The integral IR illuminator on the PVS-14 is turned on. I adjusted the gain as I swapped out apertures, turning it up as each aperture got smaller. You can see that with no aperture (Hoplite dust cover flipped open), the target is just a blur. As each aperture gets smaller, the target gets more defined. I did not adjust the focus of the objective lens for these photos. In the second photo on the right, I wanted to compare the change in relative brightness when changing apertures. I kept the camera at the same manual setting as well as the gain on the PVS-14. The IR illuminator was also on. Since the target was reflective, it's brighter than it would be if the IR illuminator were turned off. The room was very dark, and required the use of the illuminator to see properly. If I had turned it off, the view with the apertures would have been too dark to compare properly. As you can see, the smaller apertures let in progressively less light and the target gets darker. I found that for walking through a house, the 3/16" (medium) aperture provided the best balance of brightness and focus. Also note that the field of view is reduced with the use of the apertures - I'd estimate that it's reduced about 10-15% around the perimeter of the circle depending on which aperture is used. Same with the PVS-7B.
On both the PVS-7 and PVS-14, the objective lens focused at infinity is not pegged all the way to the left (when looking through the NVG); it's backed off a bit from the range of adjustment. During storage, or when mounting the NVG, it's easy to bump/rotate the objective lens so that it's no longer perfectly focused at infinity, so it's always a good idea to check it before use as it may not always be obvious, especially when it's very dark and there aren't any distant light sources to focus on. I wondered to myself whether a witness mark on the side of the lens would be of use, but probably not if you can't see it. I figured that with enough use, I'd figure out where infinity focus is, and remember how much to back off from the end of travel. Without the Hoplite, walking inside a house requires refocusing if I want to see clearly down a 30 ft hallway as well as objects in a room. With the Hoplite, no refocusing is necessary. The IR illuminator isn't needed all the time as navigating through a dark house doesn't always require a very bright image, but if you want to take a good look inside a room, then the illuminator definitely helps light it up. With the medium aperture, I'm still able to see objects clearly down to about 4 feet away. Closer than 4 ft, or at arm's length, and the objects start getting out of focus, but I'm still able to see clearly enough to perform gross tasks at arm's length. For close up tasks where I'd have to see very clearly, like reading something, then a slight twist of the objective lens is needed to focus it. The Hoplite was developed to reduce near-far focusing time and to allow nearby threat identification while the NVG's remain focused at infinity. It's most definitely faster than constantly refocusing, and using the aperture simply requires a flip of the dust cover. The end user just has to weigh that advantage against the slight reduction in field of view, and the subsequent reduction in brightness (which may be compensated for by using an IR illuminator). |
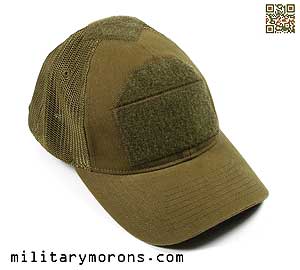
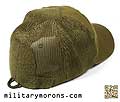
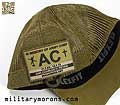
| 4/23/17 - Featured here are a few 'head gear' items from MSM (Mil-Spec Monkey); the CG-Hat Mesh Raw, MSM Watch Cap, and MSM Multi-wrap. Mil-spec Monkey - MSM was started by 'The Monkey', who was then known as 'DJ Monkeyboy' when I first met him years ago. He wrote gear reviews, then later started making patches and doing videos. Years later, MSM has become well known in the industry as the 'go-to' place for tactical and morale patches, most of which are designed by The Monkey himself, and for his enthusiastic SHOT Show videos. As time went on, The Monkey expanded his MSM-branded offerings into other products including head wear and apparel; nylon gear and accessories. MSM's sense of humour and personality is evident when you meet him or watch his videos, and a lot of that is infused into his products. MSMS CG-Hat Mesh RAW - The CG-Hat Mesh RAW featured here in Loden is the mesh version of MSM's CG-Hat RAW; which is a solid fabric ballcap. In this case, 'CG' stands for 'Cool Guy' and 'RAW' is used loosely to describe something as minimally processed; pure. Both hats are also available in DLUX (Deluxe) versions with built-in retractable ear plugs. All of the CG-Hat series are Flexfit hats; not your regular 'one size fits all' type. Flexfit hats are like 'adjustable' fitted caps; they have an elastic rim-lining material that stretches to fit your head (within your size range). An advantage of Flexfit hats over 'one size fits all' is that the size of the entire head is sized up or down; not just the head circumference. This ensures the best fit for your head. Typical 'tactical' brand hats are usually a bit too deep for me. I have a S-M sized noggin, and regular structured ballcaps look like trucker hats on me, or come down over the tops of my ears. I typically need the smaller unstructured hat but these are also a crapshoot for me and end up being too large. The DLUX Flexfit CG-Hats are offered in a couple of different sizes, and the RAW hats are offered in three (S-M, L-XL, XL-XXL). The S-M size is literally the best fitting hat I've owned - and I've owned a LOT of hats. Another nice thing about the Flexfit hats are that the back is closed. The side and rear panels of the Mesh RAW hat are a soft mesh material; not the stiff mesh you find on trucker hats. The CG-Hat is well endowed with loop velcro panels. Makes sense from a company that sells velcro-backed patches. On the front, rear and top of the hat are loop velcro fields. The front field is approximately 4" x 3" and the rear is 3" x 3" with a 5.5" x 1" strip at the bottom for name tapes. There is no top button, but a 2" x 2" loop velcro diamond/square. A small 550 cord loop is provided in the rear for hanging the cap off a 'biner or dummy cording it with a clip to your collar. The CG-Hat Mesh RAW is available in Black, Loden (shown here) and MultiCam.
|
|
MSM Watch Cap - The MSM Watch Cap is made by Tactical Tailor for MSM and modified with a velcro field in front for patches. The Watch Cap is made of 100% synthetic, no-pill POLARTEC 100 Microfleece. The loop area is approximately 4" wide x 3" tall and will accommodate a variety of patch shapes. The Watch Cap features a longer length for extra ear protection (I noticed this when compared to my Mountain Hardware fleece cap) and can be worn alone or under a helmet.
|
MSM Multi-wrap - I actually mentioned the Multi-wraps back in 2013 when they first came out. It made more sense to put them here under 'headwear' than at the end of the MSM Bottle Corset review they were previously under. The Multi-wrap is MSM's take on the old 'SAS Headover', which is a tube of fabric, usually polypro or wool, that can be configured in different ways. The MSM Multi-wrap is available in four styles: the MSM Logo Multi-Wrap, the Spartan Multi-Wrap, the Shemagh Multi-Wrap and the Skull Mask (which I suggested he do). They're all made of thin, stretchy polyester microfiber material and constructed in a seamless tube shape. The Logo wrap is a dusty brown colour and has the MSM Monkey logo design. The Shemagh Wrap is available in OD Green or Dusty Brown with a black classic shemagh design. The Skull is available in Dusty Brown or Urban. All Multi-Wraps measure 19" x 9.5" unstretched. The MSM Multi-Wrap takes up much less space than a Shemagh, and can be used in hotter weather than the thicker insulated versions. While designed primarily for hot weather use, the MSM Multi-Wrap can also be used for chilly weather. The Multi-Wrap is great for use as a neck gaiter to keep the sun off your neck when the insulated versions would be too warm. It's also thin enough to use as a face mask over your nose and mouth to keep the dust out. Again, it's thin enough such that it doesn't restrict breathing or get too warm in hot weather. The MSM Multi-Wrap can be configured quite a few different ways; like as a neck gaiter, beanie, headband, skull cap or face mask. MSM has an illustration here showing some of them. I've used the Logo Multi-Wrap during a range session on a hot day to keep the sun off the back of my neck. It also prevented hot brass from going down my shirt and kept my sling off my neck. I soaked it in water and it helped keep me cooler while the water evaporated. It was much more comfortable than a regular shemagh, plus it didn't have to be wrapped around in layers or have loose ends hanging off. Very compact and light - just the thing for hot weather. This doesn't mean that the Multi-Wrap doesn't work in cold weather. In windy and cold weather, it definitely helps cut down the bite of the wind, especially when doubled over and used as a face mask. My son wore one in the snow and it definitely helped keep his tender little cheeks from getting wind chapped.
Some more MSM items - I'd also like to mention a few more other small MSM-branded items. One is MSM's Pear-S Carabiner. Commerical carabiners in 'tactical colours' are hard to find, so MSM took the matter into their own hands. MSM now sells their own branded Pear/HMS shape S-Screwlock carabiners in black, ranger green and dusty brown. They're made of light weight aluminum with a classic pin nose for strength. The Pear shape has a large gate opening and can served as a belay device using a HMS knot (an abbreviation for the German term "Halbamstwurfsicherung" which means half clove hitch belay). The screw lock is knurled and the screw is designed such that it cannot be overtightened. It meets UIAA standards. They're a nice alternative to the commercially available 'biners you find at sports stores, and competitively priced to boot. Specs are as follows:
The MSM Mini Mod-D Carabiner MKII is a smaller 3.5" aluminum carabiner perfect for EDC use like hanging stuff off your belt or pack. Don't let the small size fool you though, as they're proper load-bearing carabiners that can be used for climbing in a pinch. They're available in black, ranger green and dusty brown. Specs are as follows:
The Monkey is the go-to place to get originally designed patches, including MSM-logo'd ones like the Monkey's Stencil PVC 1" patch - if you to rock the Monkey head logo on your TAD Gear pants, shorts and jackets (that's mostly where I've seen 1" velcro patches), or anywhere else as a subtle shout out to other MSM friends. Another cool item are the MSM logo coasters; with the Monkey Stencil logo on them. These have thick borders and are concave in the middle to hold in any condensation, which is a very thoughtful touch. They measure approx 4.5" x 4" and are made of the same PVC material as their patches. They have a slick, non-slip surface on the bottom and are textured/molded on top. I use these coasters every day; they're a very practical item (more so than patches, IMHO).
|
SightLines Headset Ear Cushions
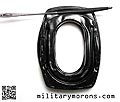
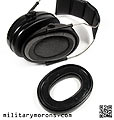
| 12/21/17 - The SightLines headset cushions from Noisefighters are replacement cushions that are designed to eliminate the issue with eyewear intereference. In doing so, they offer relief from eyewear-related pressure, superior sound isolation and less noise when used with noise-reduction headsets. SightLines started out as a crowd-funded Kickstarter project, which at the time of this writing, has been fully funded and is greenlit to go into production. Background - If you shoot, you use hearing protection and eye protection for training and recreation/sport. If you're not; you're causing irreversible, cumulative hearing loss or endangering your vision. I've been shooting guns for over 30 years. Back in the 80's my friends and I used foam earplugs. Some people stuck empty 9mm cases or cotton wool in their ears. Some didn't even bother with any protection; proclaiming that 'earplugs were for sissies'. The ringing and hearing loss from shooting weapons at the range always went away (or so we thought), and it wasn't until we were better informed on the subject that we found out that hearing loss is most often cumulative and permanent. From foam earplugs, I moved onto custom-molded silicone earplugs, which were an improvement, but did not always protect fully from high powered rifle fire. When I started to realize that my years of shooting might have contributed to tinnitus (noise or ringing in the ears); I started to worry, and turned to over-the-head hearing protection ('headsets' or 'ear muffs'). This was before the availability of electronic hearing protection, and the ear muffs at the time were bulky and got in the way of some rifle buttstock combs, plus I couldn't hear conversation around me. My first electronic hearing protectors were the Peltor Tactical 6S; which allowed me to hear ambient sounds and conversation (a new, novel thing at that time - very exciting!) but fell short in the NRR (Noise Reduction Rating) and the sound would be clipped when they shut off due to louder sounds. In 2004, I got my first 'high end' hearing protectors; the Sordin Supreme Pros, which we're much better than the Peltors for noise reduction, but didn't clip normal conversation. This was especially useful during classes or indoor ranges. I've used the same pair of Sording Supreme Pros since 2004 and they're still going strong. I usually double up my hearing protection, wearing silicone ear plugs under the ear muffs with the volume turned up to hear ambient noise. One of the best things I did with the Sordins was upgrade the foam ear cushions to gel ear cushions/cups. The gel ear cushions were more comfortable and sealed better than the foam ones. However, one issue that was never addressed was eyewear compatibility. For hearing protectors to work as designed, they need to seal properly around the ear. Anything obstructing this seal will reduce the noise attenuation capability of the ear muff. By default, eye protection/eye glass temples will often create small gaps in the seal. The ear cups will also press up agains the temples, causing discomfort and sometimes headaches. This is where SightLines enters the picture. SightLines - SightLines is the brainchild of Neal Brace, who told me that he'd actually been visiting my site since 2001/2002, before he joined the Marine Corps in 2005. After dealing with the discomfort that the combination of shooting glasses and hearing protectors produced after long periods of wear, Neal decided to do something about it. He teamed up with Jeff Kunkle, owner of Dynamic Machine, and Evans Industries to develop the SightLines headset cushions. SightLines are replacement gel ear cushions with a relief channel on top for eyewear temples to sit in. By providing a channel that is slightly above where they would normally rest on the ears, the SightLines ensure that a proper seal is formed and that the eyewear temples are not sandwiched between the headsets and the wearer's head. Neal chose the popular Howard Leight muffs to initially offer the SightLines for, but after requests for compatibility with other brands poured in, Neal turned to the Kickstarter campaign so people could provide more than just verbal support. I caught wind of Neal's Kickstarter campaign about halfway through, and reached out to Neal, offering to try the ear cups out whenever he had them available for the Sordin Supremes. He replied that if I were willing, he would send me a set of the first prototypes for MSA Sordin headsets. They were essentially the more square-shaped Howard Leight-dimensioned cushions mounted to MSA Sordin mounting plate/gaskets. Good enough to see how they would function. I quickly replied 'YES!' and received the prototypes a few days later. Shown below are the MSA Sordin SightLines prototype gel cushions. The production versions will be more rounded and the edges will line up with the mounting plate. The production ones will also be 1/8" thicker than those shown below; which will provide better cushioning. The SighLine cushion has a flattened channel at the top; that is about half the width of the total pad thickness. This channel allows the eyewear temple to sit on top of it; ensuring that the cup's seal is unbroken. The SightLine cushion is illustrated below with the MSA Sordin gel cushion (an optional upgrade from the original foam cushions). Compared to the original foam cushions, gel cushions are a huge updgrade in comfort as the gel is more compliant and comfortable than the foam. Gel also conforms much better around eyewear temples, but still put pressure on them. The SightLines gel cushions are manufactured with premium materials that match the OEM gel cushions. Silicone gel and sound-deadening memory foam internally provides the comfort. The silicone gel is flexible from -100°F to +300°F; basically through any environment that the headset will be used in. The gel is contained within an ultra-thin and rugged sheet of polyurethane, which is UV resistant, has antifungal properties, and does not absorb moisture or quickly degrade. The SightLines cushions should last through several years of normal use. My MSA Sordin gel ear cushions have lasted 10 years and counting, with no sign of degredation.
|
How they work - I wear a couple of different kinds of eyewear at the range. For outdoors, I use ESS and Revision shooting glasses with prescription inserts and low-profile temples specifically designed for use under hearing protectors. Even the low profile temples aren't perfectly comfortable; I can still feel them pressed against the sides of my head. Indoors, I typically use my everyday prescription glasses shown below; which are Oakley box springs. These glasses, however, are not designed for use under hearing protectors, so the problem is worse. The Oakley box spring temples are comfortable when worn alone, but don't sit flat against the sides of my head. When I shoot indoors, I also double up on the hearing protection and wear silicone ear plugs under my MSA Sordins. As you can see below, the Sordin gel cushions are soft enough to accommodate the temples of the Oakley glasses, but they put pressure on them and press them against the sides of my head, making them dig in. This creates a pressure hotspot on each side of the head, rather than having the cushions evenly distribute pressure around the ear. I've just dealt with it over the years; and taken it for granted as part of shooting. With the SightLines gel cushion, the temples sit in the recess on top of the cushion, a quarter inch above where they would normally sit on the ear. This tilts the glasses forward very slightly, and might feel a bit weird to begin with, but I quickly got used to it and found that it didn't affect my vision at all. Neal informed me that several testers with multifocal lens glasses and other specialty prescription lenses were consulted and verified that the small tilt in the lens did not seem to affect their vision. Neal is one of them. He contracted a disease in Afghanistan that eventually led to the destruction of his dominant eye cornea, and is forced to wear prescription glasses with a relatively high astigmatism correction. Additionally, Neal also mentioned that some people get sinus headaches due to the glasses being pinched by normal pads and then pressed down into their nose (Neal is one of them). SightLines seem to help solve this issue, as well. This was a hard one for Neal to explain and since he is not sure exactly how this is happening, he did not include this relief in the marketing material; but several reviewers had mentioned this relief to him. Normally, the headset is put on after the eyewear. With the SightLines cushions installed, the eyewear is put on after the headset (you can still put on the headset over the eyewear if you're already wearing them; you just have to remove the eyewear and put them on again). Observations and Notes - The SightLines feel identical to the OEM MSA/Sordin gel earcups, which is a good thing. The gel earcups are a 'must' for anyone who shoots with ear muffs, in my opinion. As mentioned before, the ones I were sent are not the production versions. The production versions will have the edges line up and will also be 1/8' thicker. Neal plans on offering cushions to fit a lot more brands and models of headsets; and all except the Howard Leights will be .625" thick. The Howard Leight cushions will be 0.5" thick. Comfort and eyewear compatibility - The first thing I did was replace my Sordin gel earcups with the SightLines ones. It took a minute snapping them out and the new ones in. I then tried the SightLines with a few different types of eyewear. Everything I had worked with the SightLines; I did find that it was useful to have adjustable length temples for those that wrap around the back of the ear, because the cushion adds some thickness. Most o mine, however, were straight temples, including my Oakley prescription frames, and those were easy to slip in and push down so they sat in the recess/step. The gel is very soft, so there's some adjustability/wiggle room to be had. I found that if I wore the ear cups slightly lower than I normally would, bending the top of the ear slightly, it would place the eyewear temples pretty much where they'd naturally sit on the ears without causing any discomfort to the ears. The gel can also be compressed to a certain extent, so the temples can be pushed down a bit as well. The difference was (obviously) immediate; none of the previous pressure on the temples with the SightLines cups installed and worn correctly. The only thing to get used to, is the slight forward tilt of the glasses, which really only affects prescription eyewear users. I saw no difference with non-prescription eye protection. I wore my Sordins for about an hour, sitting at the computer, with one SightLine cup installed on one side, and the Sordin gel cup on the other side. I really didn't have to wear it for an hour to notice the difference; but I wanted to try it out without the distraction of shooting at the range. At the end of the hour, I had a pressure indentation from the eyewear temple on one side of my head, and didn't have it on the other side. I later installed the other SightLines cup and wore the Sordins around the house for a while, but it didn't tell me anything I didn't already know - the SightLines were a definite improvement over the OEM gel cups when it came to elimination of eyewear temple pressure/discomfort. At the range - I was curious to see if I could notice the difference at the range, so I went to my local indoor pistol range. The indoor range is a good place to try it out as gunshots/concussions echo around in the enclosed area and earplugs or headsets alone just don't cut it for me anymore. I wore my Oakley prescription glasses, because those had the most obtrusive temples. Again, I tried the Sordins with one OEM gel cup installed and the SightLine cup on the other side. With gunfire going off, the I could now see that the temple did affect the seal on the OEM gel cup side, since the cup was sitting on top of the temple. It seemed sealed on observation, but while the gel cup can accommodate the temple as it's soft enough; it can't wrap completely around the temple and seal the gap under it (between the eyeglass temple and the side of the head). It's a small gap, but I could notice the difference since I was paying attention. I had wondered whether the reduction in thickness on top of the SightLines gel cup due to the recess would make a difference, but couldn't notice it (when trying the headset without eyewear to test that theory out). I swapped out the one OEM cup with the SightLines cup and finished off the session with both SightLines cups installed. Also note that I used them with and without my silicone earplugs for the range session. Without the silicone ear plugs, the difference in noise due to the broken seal was more noticeable; I could not hear the difference when I had the ear plugs under the ear muffs. My conclusion was that the SightLines ear cushions performed at least as well as the OEM gel cushions (to my ears) for noise attenuation, by themselves. In conjunction with eyewear, the SightLines provided an all-round seal which was a small but noticeable improvement in noise reduction. I'm also sure that if I had my original Sordin foam ear cushions installed instead of the gel ones, the difference in comfort and noise would have been greater. The original foam cushions sucked with eyeglasses, and I don't even think I kept them around. In conclusion, the SightLines addresses the issues with eyewear compatiblity that headset users like myself have simply accepted as something we'd have to live with. I'm glad that Neal did something about it, and look forward to seeing the production items come out. I'll update this writeup when they do. It's a no-brainer for headset users to upgrade to the SightLines; your head will thank you. Additional notes - The SightLine replacement ear cushions are not designed only for shooters, but also for audio, aviation headsets and noise-cancelling headsets. To accommodate the wide range of makes and models, different mounting options are planned:
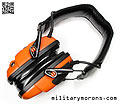
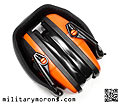
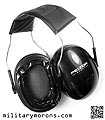
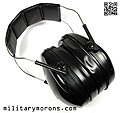
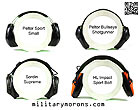
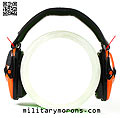
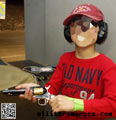
The SightLines ear cushions will be made by Evans Industries in the USA. For a list of compatible headsets, visit the Kickstarter page. The Kickstarter campaign ends Dec 28, 2017, so order before then for Early Bird discount pricing and lifetime guarrantee. After the Kickstarter campaign has ended, pre-orders can still be placed, but without the Early Bird discount and lifetime replacement guarrantee. 5/4/18 Update - Howard Leight model - Shown here is the SightLines Ear Cushions HL (Howard Leight) model, with the Howard Leight Impact Sport Bolt earmuff. The Bolt is their newest model with digital compression circuitry instead of analog. It looks identical externally to the Impact Sport. Strangely, while the Bolt has been out for a while and available at various dealers/vendors, I cannot find it listed on the Howard Leight website at the time of this writing. The SightLine HL ear cushions utilize a semi-rigid backing material to lock the pads into place on Howard Leight headsets. There's a little lip, or flange running around the perimeter of the ear cushions. The ear cup itself has small tabs which engage the lip and keep the ear cushion secured. The OEM cushion is relatively comfortable and soft, but not as conforming as the SightLines gel cushion. The SightLines cushion is also slightly thicker than the OEM one, but still allows the headset to fold completely. Peltor Tactical model - The SightLines Peltor Tactical Model utilizes a model-specific/snap in mount that is compatible with most Peltor hearing protectors. The SightLine cushion is adhered to a hard plastic ring mount that's identical in dimensions to the Peltor OEM one. Shown below is the Peltor Sport Small, which is designed for youths and smaller adults. I also have an old pair of Peltor Bulleseye Shotgunners, which are probably one of the first compact earmuffs I bought years ago. I used to have a Tactical 6S, but those died on my and I threw them away. I do know that the ear cushions for them were interchangeable. The SightLines are a direct replacement for the OEM cushions. Just pop off the OEM ones and snap the SightLines in. I installed them on the Sport, which I bought after the Howard Leight Bolts didn't work for my 10-year old son. Notes/Observations - Neal had recommended I give the Howard Leight Impact Sport Bolts a try, so I ordered a pair, primarily for my 10-year old son. Unfortunately, they could not be adjusted small enough to fit his head, and they just fit me (I'm a medium-sized head). The issue with the design is that the bottom of the head band interferes with the top of the ear cup unless the cups are extended about halfway. I took a picture of different headsets mounted on the same 6.5" diameter circle. I've illustrated the Peltor Sport Small, Peltor Shotgunner, Sordin Supreme Pro and the HL Bolt below. As you can see, the Bolt cannot be used when the cups are in their retracted position. The design of all the other headsets have enough clearance to be used for their full range of adjustment. So, the Bolts are now my backups to the Sordins. I wore them at the range and didn't have any issues with them, other than getting them to fit right. Even for me, they were a bit big when adjusted to their smallest, but they work. Functionally, they worked quite well; there was no clipping and I could hear conversations while they blocked out gunfire. I just wasn't fond of the fit. The SightLines ear cushions are a definite improvement over the OEM HL cushions, as I found that they seal better. The pliability of the gel cushions becomes really important for a good fit and seal; especially with younger shooters like my son. He's small, and has a skinny neck. I found that some types of headsets like the Sordins with behind the neck band wouldn't work as the ear cups would not seal behind the ears. Unfortunately, I didn't realize this at his very first range session, which was why he was so bothered by the sound of guns firing in an indoor range. He did, however, prefer the comfort of the gel SightLines cushions vs. OEM foam/padding. So, I ordered the Peltor Sport Small specifically for him, hoping that they'd work as advertised. Indeed they did. I was very pleased to see that they had a good range of adjustability, and the tension was good (not too loose nor too tight). When Neal sent me the Peltor cushions, I snapped them in and my son said that they felt great. They sealed well all around the ear and his shooting glasses were more comfortable, with the temples sitting in the relief in the cushion. I can't really recommend the Howard Leight Impact Sport Bolts unless you have a medium to large head. It won't work on kids or smaller heads. I can wholeheartedly recommend the Peltor Sport Small for kids or smaller heads. Either way, the SightLines ear cushions improve both products when installed on them. |
ATTENTION! DO NOT LINK DIRECTLY TO MY IMAGES -
IT IS A COPYRIGHT VIOLATION
/ . PLEASE
OBSERVE AND RESPECT OUR COPYRIGHT! . /
©opyright by MilitaryMorons.com. All Rights Reserved. Reproduction, Duplication,
Distribution Strictly Prohibited.
Unless mentioned otherwise, content and images are the
property of militarymorons.com and are not in the public domain.
They are not to be used without
permission. Please Contact
me for permission to use any images or content herein.


